
For many beginner gardeners, the hardest part of gardening is waiting for the weather to warm up enough to start planting. Early spring often brings unpredictable temperatures, late frosts, and cold soil that slows plant growth. Fortunately, there is a simple solution that gardeners have used for centuries: the cold frame.
A cold frame is a small protective structure that helps create a warmer environment for plants. It allows gardeners to start vegetables earlier in the spring and continue growing later into the fall. Because it is simple to build and inexpensive, a cold frame is one of the best tools beginners can add to their garden.
What Is a Cold Frame
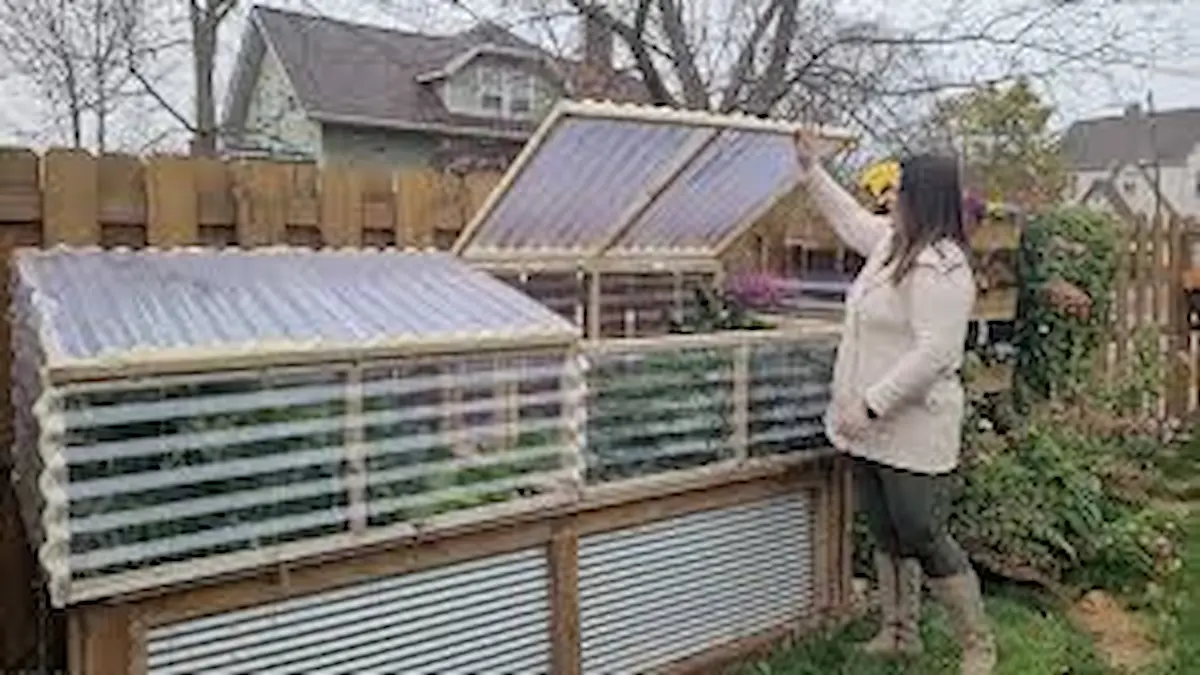
A cold frame is essentially a small box with a transparent lid. The box is usually placed directly on the soil, and the lid is made from glass or clear plastic. Sunlight enters through the top and warms the air and soil inside the structure. Because the lid traps heat, the temperature inside the frame becomes warmer than the surrounding outdoor environment.
This process works in the same way as a greenhouse, but on a much smaller scale. Cold frames are often described as mini greenhouses because they provide a similar protective effect without requiring a large structure or expensive materials.
The warmer conditions inside the frame help protect plants from frost, reduce wind exposure, and allow seeds to germinate earlier than they would in open garden beds.
Step 1: Choose the Right Location
The first step in setting up a cold frame is choosing the right location. Since cold frames rely on sunlight to generate heat, they should be placed in a location that receives plenty of direct sunlight.
A south-facing or southeast-facing area is usually ideal. These directions capture the most sunlight during the day, which helps warm the frame more effectively. It is also helpful to place the cold frame in a spot that is protected from strong winds.
Some gardeners place cold frames near walls, fences, or buildings. These structures can block cold winds and also reflect heat back toward the frame, creating slightly warmer conditions for plants.
Good drainage is another important factor. The soil beneath the cold frame should not collect standing water, as overly wet soil can harm plant roots.
Step 2: Build the Frame
Cold frames are popular because they can be built using simple materials. Many gardeners construct them from recycled items.
The frame itself is usually made from wooden boards, bricks, or cinder blocks arranged in a rectangular shape. The height of the frame is generally low, often between 12 and 18 inches.
Many gardeners design the back of the frame slightly taller than the front. This creates a sloped lid that captures more sunlight and allows rainwater to drain off easily.
The lid is one of the most important parts of the structure. Old windows are commonly used because they are transparent and durable. Clear plastic panels or polycarbonate sheets can also work well.
Attaching hinges to the lid makes it easier to open and close the frame when necessary.
Step 3: Prepare the Soil
After building the frame, the next step is preparing the soil inside it. Because the frame sits directly on the ground, plants can grow in the soil beneath the structure.
Loosen the soil and remove any weeds or debris. Adding compost or organic matter can improve soil quality and help support plant growth.
Some gardeners also place seed trays or containers inside the cold frame. This approach is useful for starting seedlings that will later be transplanted into the main garden.
The soil inside a cold frame typically warms faster than open soil, which encourages seeds to germinate earlier.
Step 4: Plant Cold-Tolerant Crops
Cold frames work best for cool-season vegetables that can tolerate lower temperatures.
Some of the most popular crops for cold frames include:
- lettuce
- spinach
- kale
- arugula
- radishes
- green onions
- Swiss chard
These vegetables grow well in cooler conditions and often mature quickly. By planting them in a cold frame, gardeners can harvest fresh produce weeks before outdoor gardens are ready.
Warm-season crops such as tomatoes, peppers, and cucumbers usually require more heat and are better started later in the season.
Step 5: Manage Temperature and Ventilation
While cold frames protect plants from cold weather, they can sometimes become too warm during sunny days.
Even when outdoor temperatures are cool, the inside of a closed cold frame can heat up quickly. If temperatures rise too high, plants may wilt or become stressed.
To prevent overheating, gardeners open the lid slightly during warm parts of the day. This allows fresh air to circulate and helps regulate temperature.
In the evening, the lid should be closed again to trap heat overnight and protect plants from colder nighttime temperatures.
Learning how to manage ventilation is one of the most important skills in cold frame gardening.
Step 6: Water Plants Carefully
Plants in cold frames still require regular watering, but they often dry out more slowly than plants in open beds.
Check the soil regularly before watering. The soil should remain slightly moist but not overly wet.
Watering earlier in the day is usually best because it allows excess moisture to evaporate before cooler nighttime temperatures arrive.
Proper watering helps prevent plant diseases and supports healthy growth.
The Bottom Line
Cold frames are one of the simplest ways for beginners to extend the gardening season. With just a small box and a transparent lid—often made from a recycled window—gardeners can create a protected environment that keeps plants warmer than the surrounding air.
By choosing a sunny location, planting cool-season vegetables, and managing ventilation carefully, gardeners can start growing earlier in the spring and continue harvesting later in the year.
For beginner gardeners looking for an easy and affordable improvement, a cold frame can make a big difference in both the length and productivity of the growing season.