
Most compost piles across Zones 4–7 spent the last 3–4 months frozen or near-dormant. Reactivation takes one afternoon and three specific inputs — but the order matters, and skipping a step delays usable compost by 4–6 weeks.
Air temperatures across USDA Zones 5 through 7 are crossing the 50°F threshold this week — the point at which microbial activity in compost piles resumes after winter dormancy. According to Penn State Extension, compost goes dormant when temperatures drop below freezing, but decomposition restarts once the pile warms above 50°F. According to University of Illinois Extension horticulture educator Gemini Bhalsod, the process requires assessing the pile’s current state, managing inputs, and turning for aeration. The catch: a pile that sat untouched since November will not restart on its own at the speed needed to produce finished compost before spring planting in April or May. Active intervention now means usable compost in 6–8 weeks. Waiting until April pushes that timeline into midsummer.
The short answer:
- Assess the pile for structural damage, debris, and signs of activity
- Turn the entire pile with a pitchfork to reintroduce oxygen
- Rebalance moisture and the carbon-to-nitrogen ratio (target 25–30:1)
- A pile reactivated this week can produce finished compost by early to mid-May
Why a Dormant Pile Does Not Fix Itself
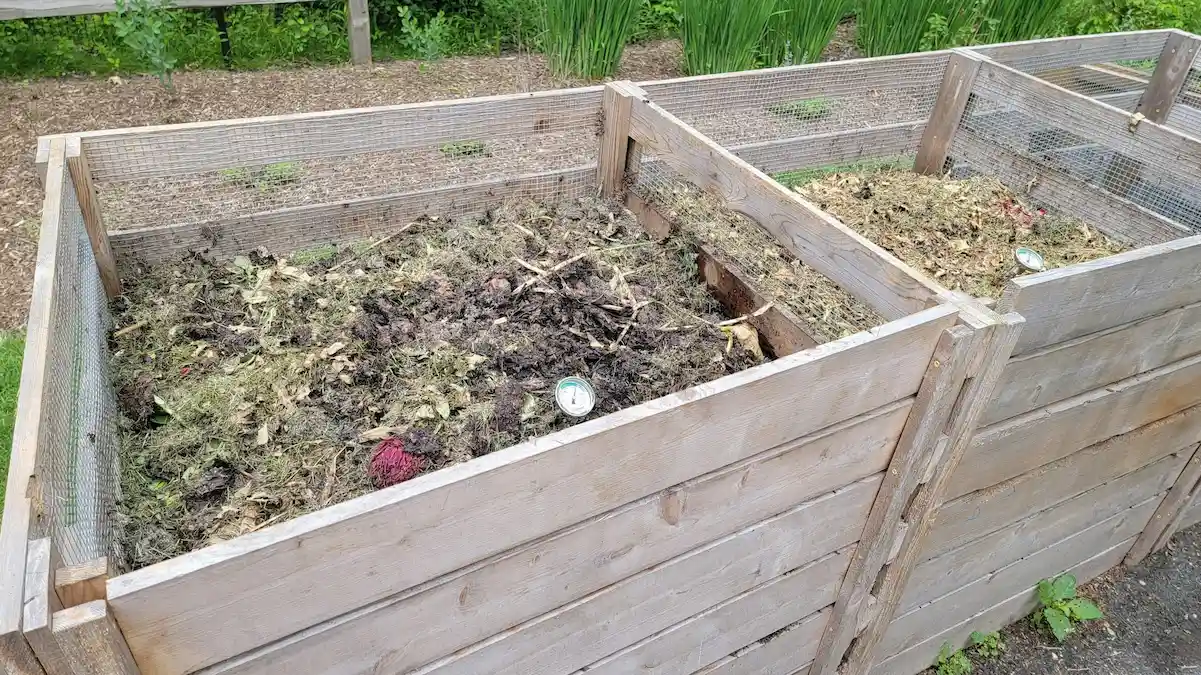
Composting is a biological process driven by aerobic microorganisms — bacteria and fungi that require oxygen, moisture, carbon, and nitrogen in specific proportions. During winter, freezing temperatures kill or deactivate the thermophilic bacteria responsible for the hot composting phase (130–160°F internal temperature). The pile compacts under snow and rain, squeezing out air pockets. Moisture content shifts unpredictably: some piles freeze solid, others become waterlogged.
When spring temperatures rise above 50°F, mesophilic bacteria begin repopulating. But without intervention, this process is slow. A compacted, unbalanced pile may take months to reach usable temperatures. A pile that receives the three inputs below — aeration, moisture correction, and fresh nitrogen — can reach 130°F within 7–14 days.
Step 1: Assess and Repair
Before adding anything, inspect the pile or bin. University of Illinois Extension recommends checking for winter debris — branches, trash, animal activity — and repairing any structural damage to bins. Cracked wood, broken plastic, or collapsed wire fencing reduces airflow and containment.
Check the pile’s interior. Insert a hand or compost thermometer into the center. If the core feels warm or steam rises when the pile is disturbed, some microbial activity survived the winter. Finished compost — dark, crumbly material — may already exist at the bottom. Pull that out and set it aside for immediate garden use. Everything above it goes back into the active pile.
Remove any large, uncomposted items: corn cobs, avocado pits, thick branches over 1 inch in diameter. These slow the process and do not break down at the same rate as finer material.
Step 2: Turn and Aerate
Use a pitchfork to turn the entire pile. Move material from the outside edges into the center and bring compacted interior material to the surface. The goal is full oxygen reintroduction. Cornell Composting Science notes that aerobic decomposition requires consistent airflow — compacted piles shift to anaerobic conditions, producing hydrogen sulfide (the rotten-egg smell) instead of compost.
Turn the pile completely, not just the top layer. For a standard 3x3x3-foot bin, this takes 20–30 minutes. Larger piles take longer but follow the same principle: every part of the pile needs exposure to air.
After turning, the pile should feel loose and springy, not dense or matted. If large clumps remain, break them apart with the pitchfork before moving on.
Step 3: Rebalance Moisture and Inputs
After turning, assess moisture. Penn State Extension recommends a simple squeeze test: grab a handful of material and squeeze. A properly hydrated pile produces a few drops of water but does not drip freely. If the pile is soggy — common after winter snow and rain — do not add water. Turning alone will help dry excess moisture by introducing air. If the pile is dry and dustite, add water gradually with a watering can while turning, aiming for even distribution.
Next, rebalance the carbon-to-nitrogen ratio. Cornell University composting research identifies a C:N ratio of approximately 30:1 as optimal for active decomposition. After months of dormancy, most piles are nitrogen-depleted. Add fresh green material: kitchen scraps, coffee grounds, or a 2–3-inch layer of fresh grass clippings if available. For every bucket of green (nitrogen) material, add three buckets of brown (carbon) material — dry leaves, straw, shredded cardboard, or wood shavings.
If no green material is available in early March, substitute 1 cup of balanced granular fertilizer (10-10-10) per cubic yard of compost as a nitrogen boost. This is not the preferred method but will jump-start microbial reproduction when fresh greens are scarce.
What NOT to Do
❌ Adding water to an already waterlogged pile — After winter thaw, most piles across Zones 5–7 are too wet, not too dry. Adding water to a saturated pile creates anaerobic conditions, kills beneficial microbes, and produces foul odors. Turn first. Assess moisture second.
❌ Turning without rebalancing inputs — Aeration alone is not enough. A nitrogen-depleted pile that gets turned will warm slightly but stall before reaching thermophilic temperatures. Fresh nitrogen is the fuel that restarts the heat cycle.
❌ Putting uncomposted material directly on garden beds — Partially decomposed compost applied to soil ties up nitrogen as soil microorganisms work to finish the breakdown process. This robs nearby plants of available nitrogen during the critical early growth window. Only dark, crumbly, earthy-smelling finished compost should contact garden soil.
❌ Ignoring pile size — A pile smaller than 3x3x3 feet (27 cubic feet) cannot retain enough heat for thermophilic composting. If the pile shrank significantly over winter, consolidate material from multiple bins or add fresh inputs to rebuild volume before expecting heat generation.
This Week (March 10–16)
☐ Inspect bin structure and remove winter debris
☐ Pull out any finished compost from the bottom for immediate use
☐ Turn the entire pile with a pitchfork
☐ Perform the squeeze test and correct moisture if needed
By April 10
☐ Add fresh nitrogen material (greens or fertilizer) to rebalance C:N ratio
☐ Turn the pile again 7 days after initial activation
☐ Check internal temperature — target 130°F or above within 14 days
☐ Turn once per week through April to maintain oxygen levels
☐ Begin planning raised bed soil preparation with finished compost from the bottom of the pile
If seed starting is also on the schedule this month, the March indoor timing guide for tomatoes and peppers covers zone-by-zone sowing dates for the two crops most gardeners start first.