
Making mustard from your own seeds is one of those processes that feels far more complex than it actually is. In reality, it’s closer to mixing than cooking — but the difference between a flat, harsh paste and a deep, balanced mustard comes down to a few small decisions.
If you’ve grown mustard plants, you already have the hardest part done. The seeds, once dried, store well and can be used months later without losing much of their potency.
Understanding What You’re Working With
Mustard seeds don’t taste like mustard on their own. When dry, they are mild and almost nutty. The sharp, familiar heat only develops when the seeds are crushed and mixed with liquid.
This reaction is explained in Science of mustard pungency (BBC Good Food) — enzymes in the seed react with water to produce the compounds responsible for heat. The type of liquid and temperature you use will determine how strong that heat becomes.
That means you are not just making mustard — you are controlling a chemical reaction.
Harvesting and Preparing the Seeds
If you’re growing your own mustard, wait until the seed pods turn dry and brittle on the plant. Cut the stalks and let them dry further in a warm, airy place. Once fully dry, the pods can be crushed or shaken to release the seeds.
Clean them by removing bits of husk and debris. It doesn’t have to be perfect, but cleaner seeds produce a cleaner flavour.
Store them dry until you’re ready to use them. Properly dried mustard seed keeps for a long time without losing quality.
The Basic Method
At its simplest, mustard is just crushed seeds mixed with liquid, salt, and something acidic like vinegar.
Start by crushing the seeds. You can grind them into a powder for a smooth mustard or crack them roughly for a more textured result. A mix of both often works best — it gives body while still allowing the mustard to hold together.
Add your liquid slowly. Cold water produces the strongest heat, while warm or hot liquid softens the sharpness. Vinegar not only adds flavour but also stabilises the mustard and slows down the loss of pungency over time.
Once mixed, the mustard will taste harsh and slightly bitter at first. This is normal. Let it sit for at least 24 hours. During this time, the flavour rounds out and becomes more balanced.
Adjusting Flavour and Texture
This is where homemade mustard becomes more interesting than anything store-bought. You can control every part of the final result.
More vinegar makes it sharper and longer-lasting. More water softens it. Adding a small amount of honey or sugar balances the heat without making it sweet in an obvious way.
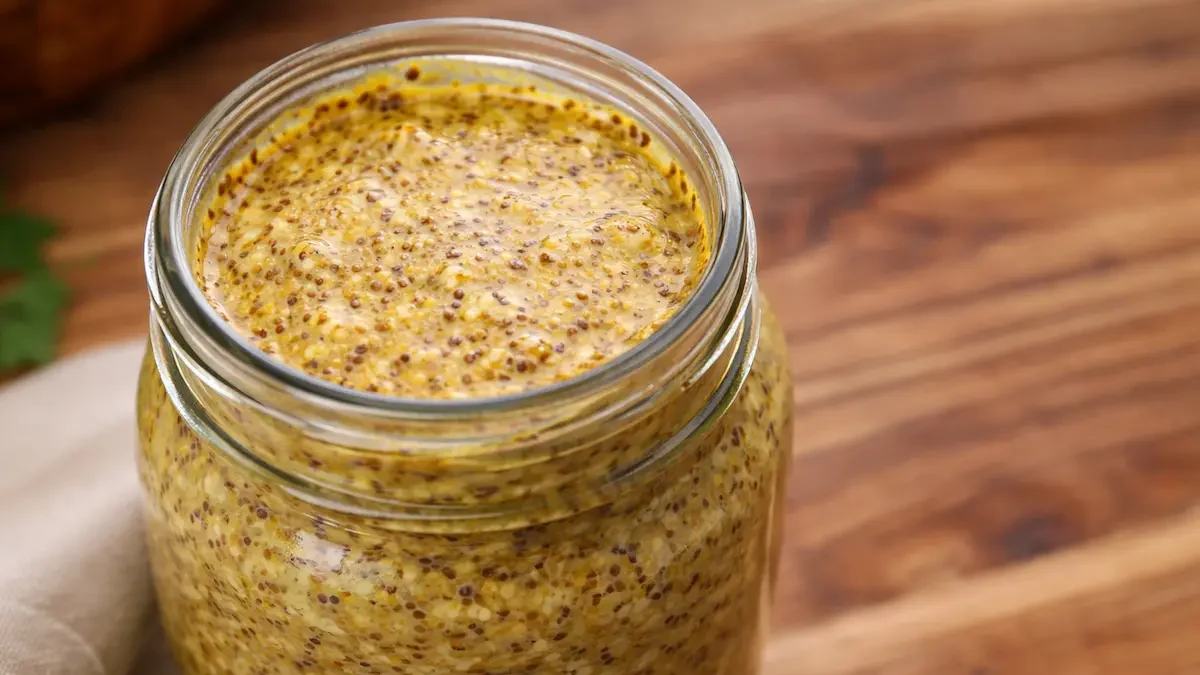
Texture is just as flexible. A fully ground mustard becomes smooth and spreadable. A coarser grind gives that classic wholegrain texture, where the seeds pop slightly when eaten.
You can also experiment with adding cider, beer, or even herbal infusions instead of plain water. Each one shifts the flavour in a noticeable way.
What Most People Get Wrong
The biggest mistake is expecting instant results. Freshly mixed mustard is almost always unpleasant — too sharp, too raw, and unbalanced. Time is part of the process, not an optional extra.
Another common issue is using too much liquid at once. Mustard thickens as it sits, but if you start too thin, it never quite recovers the right consistency.
Temperature is another factor people overlook. Using hot liquid reduces heat significantly, which can leave the final result tasting flat.
A More Practical Way to Think About It
Making mustard is less like following a recipe and more like setting a direction. You decide how strong, how sharp, and how textured you want it to be, then adjust as it develops.
Once you understand that, it becomes repeatable. You’re no longer guessing — you’re refining.
Storage and Use
Homemade mustard keeps well in the fridge for several months. Over time, the heat will gradually soften, but the flavour often becomes more complex.
Keep it in a sealed jar to limit air exposure. Like many preserved foods, it tends to improve slightly after the first few days.
Why It’s Worth Doing
Growing mustard and turning it into something usable closes a small but satisfying loop. Instead of just harvesting seeds, you’re creating a finished product that stores well and fits directly into everyday cooking.
It’s also one of the few condiments where the difference between homemade and shop-bought is immediately noticeable. Once you make it yourself, it’s hard to go back.